Chapters
- Introduction
- Chapter 1 - Overview of your Known site
- Chapter 2 - Edit your profile and settings
- Chapter 3 - Customize your site configurations
- Chapter 4 - Connect your social accounts
- Chapter 5 - Publish and edit content
- Chapter 6 - Embed content
- Chapter 7 - Search & filter content
- Chapter 8 - Use feeds & RSS
- Chapter 9 - Organize with hashtags
- Chapter 10 - Other resources
Overview of Your Known Site
To sign into your Known site, go to your site URL and click on the “login” link in the upper right corner of the navigation menu. Sign into your site with your username or email address and your password. Alternately, you can navigate to http://example.withknown.com/session/login to get to your login page (replace “example” with your site domain) or you can sign in via withknown.com.
Once you’ve signed in, you’ll be viewing your site’s main stream of content. From this page you can view your site’s stream, publish new content, or search for previously published things.
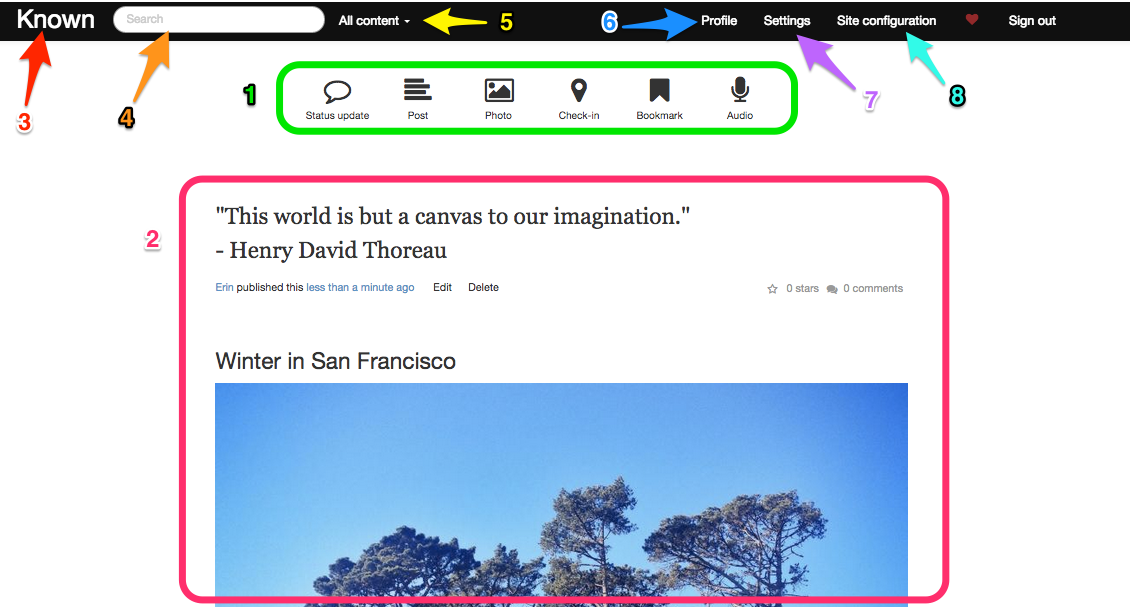
- Publish Content: Click on any of the icons at the top of the home stream to publish new content. Each icon corresponds to a specific kind of content that you can publish.
- Content Stream: All of the most recently published content appears here in your stream.
- Site Title: You can always click on the name of your site to return to your home screen. You can edit the site title in “Site Configurations.”
- Search: Search all of your previously published content. You can search for words within the content or hashtags.
- Filter: Select the dropdown to generate a filtered view of the content that you’ve published. For instance, if you want to see all of your images, choose “Photos” from the dropdown.
- Profile: View and edit your profile on this Known site.
- Settings: View the options for your account and personal settings. Here you can change notifications, connect to your social accounts, update your password, and more.
- Site Configuration: This option is only visible if you are an administrator for this Known site. Under the site configuration, you can change settings related to the site. This includes changing the site name, updating the theme, adding new plugins, and inviting new users to join the site as authors.
This how-to guide was last updated on August 7, 2015.